[항해99] 34일차 Sequlizer , mySQL , modeling


항해 99

34일차:
새로운 프로젝트, 새로운 팀원, 오늘 이 34일차중에 공부 제일 많이했고 제일 재미있엇던 날인것같다.
sequlizer 공식문서를 뜯어봤고, modeling , association까지 다했다.
특히 제일 좋앗던부분은 export import부분에 관해서 확실히 알게된것같다.
또한 서로 엉킨 참조부분에서 export 를 functoin으로 해서 가져다쓰는것도 해봤다.
SQL관계형 db도 association 정해서 해주는부분도 신기했다. SQL 분명히 배웠는데 하나도기억안나다.
Primarykey랑foriengn key밖에 생각안났는데 이부분은 항해끝나고라도 한번더 확실히 짚고 넘어가야돼지않나 싶다.
1) JS
JS : this , arrow function
this - > 그냥쓰거나 일반 함수에서 사용하면 window
this -> object 내 함수에서 쓴면 그함수의 주인 오브젝트
//
var objecct={
	data:{
    	method :function(){
        	console.log(this)
            }
          }
}

object.data.method().


//arrow function  this is inherited ?
var objecct={
	data:{
    	method :()=>{
        	console.log(this)
            }
          }
}

object.data.method().
2. this in constrocutor => object생성할때
3. this in eventListener =>. e.currentTarget
2) SQL db modeling
https://www.youtube.com/watch?v=ExTZYpyAn6s
백앤드 모델링
app.js
const express = require("express");  // import express
const { sequelize, Comment , Ad, User} = require("./models/index") // import sequelize,Comment ,Ad,from index)

const app = express(); // express
app.use(express.json())  // express using jsaon
app.use(express.urlencoded({ extended: true }))

sequelize.sync({ force: false })  // not sync with modeling <-> mysql
    .then(() => console.log("Connected to MySQL."))
    .catch((err) => console.error(err))

app.listen(8080, () => {

  console.log("서버가 켜졌어요!");
});
index.js
const Sequelize = require('sequelize')// import sequelize library
const env = process.env.NODE_ENV || 'development' // not sure
const config = require(__dirname + '/../config/config.json')[env] // not usre
const Comment = require("./comments") // import comment modeling function
const Ad = require("./ads")
const User = require('./users')

// instanciate by library
const sequelize = new Sequelize(
  config.database,
  config.username,
  config.password,
  config
)

// initialing db object
const db = {}

db.sequelize = sequelize  // insert sequelize in to object
db.Comment = Comment(sequelize, Sequelize.DataTypes)
db.Ad = Ad(sequelize, Sequelize.DataTypes)  //  question => how do we know this part ? cuz the function using this two parameters to make the model
db.User = User( sequelize, Sequelize.DataTypes)

// association
db.Ad.hasMany(db.Comment)
db.User.hasMany(db.Ad)
db.User.hasMany(db.Comment)


module.exports = db
modeling - user
// import module
const hash = require('object-hash');


// define methode for modeling
module.exports = function( sequelize, DataTypes) {
    const User = sequelize.define('User', {
        // Model attributes are defined here
        userId: {
            type: DataTypes.STRING(20), // 글자수 제한
            unique: true, // 중복 방지
            allowNull: false // 띄어쓰기 불가
        },
        nickname: {
            type: DataTypes.STRING(20),
            unique: true,
            allowNull: false
        },
        password: {
            type: DataTypes.STRING,
            allowNull: false,
            set(value) {
                this.setDataValue('password', hash(value));
            }
            // allowNull defaults to true
        }
    }, {
        // Other model options go here
        timestamps: true
    });
    return User
};
정말 많은것을 배웠고, 정말 computational thinking 이 뭔지 좀더 알게된느낌이다.
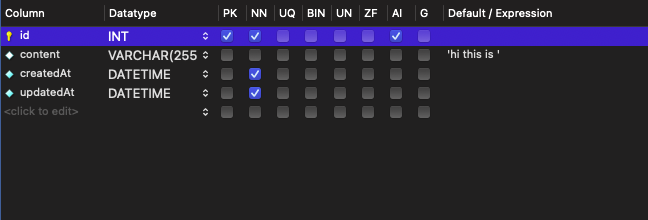
sql workbench
나중에 이부분에서 스케마에서 누가 pk이고 각각의 characterlistic들을 확인할수잇다.
Association 부분
ㅇmodel/index부분에서 model들을 한번에 모아준다는 느낌으로 이해를했다.
그곳에서 assocication을 지정해주는데,
1. 포스트에 여러개의 코맨트가 달릴수있다.
2. 유저가 많은 포스트를할수있다.
3. 유저가 많은 코맨트를쓸수있다.
로 관계를 설정해줬다.
model/index.js
db.Ad.hasMany(db.Comment)
db.User.hasMany(db.Ad)
db.User.hasMany(db.Comment)
app.js
하드코딩으로 하나씩 지정해줘서 넣어보고싶었다.
여기서꼭 user를 (누가) 를 지정을해줘야한다. 이부분은 하드코딩으로 입력이되지않았다.
그래서 꼭 이미 등록된 user중에 찾아서 ,
user.addAd(ad)이부분을 통해서 foriegn key로할당된 UserId부분에 값이들어가는지 확인가능했다.
app.get('/ad', async(req,res)=>{
    const user = await User.findByPk(1)
    const ad = await Ad.create({
        title: "potato1",
        category:"potato2",
        content: " potato3",
    })
    user.addAd(ad)
    res.send(ad)
})
아까만해도 오늘 TIL에 작성할것들이 한가득이였는데, 지금은 또 이렇게밖에 못남긴다.
내일 이라도 한번더 읽어보고, 필요한부분은 추가해야겠다.
이렇게 일주일 프로젝트를한다면 , 엄청난 실력향상이 되지않을까 기대한다.
엄청나게 좋은 팀원 을만난것같아 좋다.
'IT > Bootcamp 항해99' 카테고리의 다른 글
| [항해99] 36일차 API 짜기 (0) | 2021.07.13 |
|---|---|
| [항해99] 35일차 expresss (0) | 2021.07.11 |
| [항해99] 33일차 미니프로젝트 (4) | 2021.07.10 |
| [항해99] 32일차 노드 심화 숙제 (0) | 2021.07.08 |
| [항해99] 31일차 JWT (2) | 2021.07.08 |